If you get tired with Windows or Mac, like me, you might want to consider migrating to Ubuntu Trusty 14.04, which is the Long Term Support (LTS) version of the Ubuntu operating system for desktop PCs and laptops. It can be downloaded from Ubuntu official site for free and it is easy to install following the instructions there. Recently, I just downloaded and installed it on my old HP Compaq 6510b laptop. Comparing to almost 20 GBs of my old Windows 7 system, my new Ubuntu system only occupies 6.3 GBs and runs much faster.
This post describes installation processes of some software that I have been using in Windows 7 and I would like to move to my fresh installed Ubuntu. Most of these processes followed instructions from Ubuntu support forums, Ask Ubuntu, where you can get nearly all answers to any technical issues you might encounter. All processes posted here have been tested by myself and guaranteed working, at least on my laptop. I hope you find them helpful.
Install Google Chrome
Ubuntu has its own default web browser, Firefox, which is also very powerful. But I have been using Google Chrome for such a long time that I don’t want to change. On Ubuntu, you can install either Google Chrome or Chromium-browser, see this post for the difference between the two. Because Google Chrome includes a variety of closed-source bits that Chromium lacks, I decided to stay with Google Chrome. I have followed steps below to download and install Google Chrome:
-
Click Download Chrome
-
Choose either 32 bit .deb(for 32bit Ubuntu) or 64 bit .deb (for 64bit Ubuntu)
-
Click Accept and Install
-
Download .deb file to a folder (Downloads is the default folder)
-
Open up your Downloads folder
-
Double-click the .deb file you just downloaded
-
This should launch Ubuntu Software Center
-
When it prompts you to whether you wish to install Chrome, just say yes
-
Input Password when asked to install
After install, Chrome will be updated through the normal Ubuntu update process, so you can get the latest version when Ubuntu updates.
Install Microsoft Fonts in LibreOffice Suits
By installing Microsoft Fonts on Ubuntu, I am not going to say Ubuntu default fonts are not good. In contract, I think they are more beautiful than the Microsoft fonts. I am still using Windows 7 on my office computer, and I need the popular fonts that are created by Microsoft, such as Times New Roman and Calibri, installed on my Linux system to see the documents as they were intended to look on Windows.
According to the Chris Hoffman’s post, I have installed two Microsoft font packages:
(1) Microsoft’s TrueType Core Fonts
This font pack contains Arial, Arial Black, Andale Mono, Comic Sans MS, Courier New, Georgia, Impact, Times New Roman, Trebuchet, Verdana, and Webdings. Times New Roman was the default font for Microsoft Office documents before its 2007 version.
This package can be installed through following steps:
-
Run command
sudo apt-get install ttf-mscorefonts-installerin the terminal -
Type your password when promoted
-
Select yes when ask do you want to continue
-
When license agreement appears, use ** up/down** arrow keys to scroll through it
-
Press Tab or Right Arrow key to select the OK button and press ** Enter** to accept the EULA licence agreement to install
(2) Microsoft’s ClearType Fonts
This font pack includes fonts Calibri, Cambria, Candara, and Consolas, Constan, Corbel. These fonts have been added in Windows Vista and Office 2007. Among them, Calibri became the default font since Microsoft Office 2007.
This package can be installed through following steps:
-
Create a hiden folder .fonts under the Home directory through running command
mkdir .fontsin the terminal -
Run following command in the terminal. This command downloads and runs the VistaFonts-Installer script, which downloads the fonts from Microsoft and installs them on the system:
wget -qO- http://plasmasturm.org/code/vistafonts-installer/vistafonts-installer | bash
After install, these fonts are available in LibreOfficer.
Install Java 8 and Eclipse
Install Java 8
You can follow the steps from liquidweb to install Java 8 through the WebUpd8 Team Personal Package Archive (PPA). However, I adapted the manual process specified by this post directly from the tar.gz provided by Oracle.
-
Download the JDK 8 file from Oracle (I chose jdk-8u66-linux-x64.tar.gz)
-
Go to the directory where the downloaded file locates (usually Downloads) and extract the JDK file through GUI (right click -> Extract Here) or running command:
sudo tar -zxvf jdk-8u66-linux-x64.tar.gz. -
Move the extracted folder to /usr/lib/jvm, through
sudo mv jdk1.8.0_66 /usr/lib/jvmThis is not required, but it is the place where Java runtime software is installed. -
Create a file /etc/profile.d/oraclejdk.sh through
gksudo gedit /etc/profile.d/oraclejdk.shand put following content in it. TO make these environments effective, you have to reboot.export J2SDKDIR=/usr/lib/jvm/jdk1.8.0_66 export J2REDIR=/usr/lib/jvm/jdk1.8.0_66/jre export PATH=$PATH:/usr/lib/jvm/jdk1.8.0_66/bin:/usr/lib/jvm/jdk1.8.0_66/jre/bin export JAVA_HOME=/usr/lib/jvm/jdk1.8.0_66 export DERBY_HOME=/usr/lib/jvm/oracle_jdk8/jdk1.8.0_66/db
Install Eclipse IDE
I used following steps to install the newest Eclipse Mars.1 (4.5.1):
-
Download the Eclipse IDE for Java EE Developers for my Linux version (64 bit) from Eclipse Downloads
-
Extract the downloaded file and move it to /opt/
-
Create a launcher shortcut for Eclipse through running
gksudo gedit /usr/share/applications/ eclipse.desktopand paste following content in it:[Desktop Entry] Name=Eclipse Mars.1 (4.5.1) Type=Application Exec=/opt/eclipse/eclipse Terminal=false Icon=/opt/eclipse/icon.xpm Comment=Integrated Development Environment NoDisplay=false Categories=Development;IDE; Name[en]=Eclipse
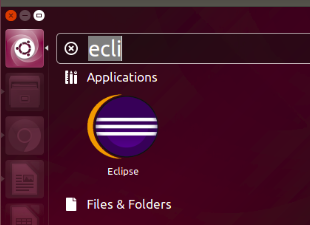
Then, I can open Eclipse from Unity search:
Install Python 3.5 and Packages
I used Anaconda (by Continuum Analytics), which is a free, cross-platform, and easy-to-install all-in-one scientific Python distribution. Anaconda comes with various packages that I’m using, such as NumPy (providing a practical array data structure), SciPy (scientific computing), matplotlib (graphical plotting), pandas (data analysis and statistics), scikit-learn (machine learning), SymPy (symbolic computing), and Jupyter/IPython (efficient interfaces for interactive computing).
Anaconda can be installed through following steps:
-
Go to Anaconda download page , download the installer with my system version (64-bit) and python version (Python 3.5) from Anaconda for Linux
-
Go to the directory where the downloaded file locates (usually Downloads ) and run the command
bash Anaconda3-2.4.1-Linux-x86_64.sh -
Follow the instructions to install Anaconda and choose put Anaconda to the system path, so that Anaconda’s Python will be the system default
Anaconda comes with a package manager named conda, which helps me manage myPython packages, environments, and more, please read my another post about installing and using Anaconda.
Install Fcitx for Chinese Language Input
Follow the instructions from post, I set up Fcitx for Chinese Language input:
-
Remove any IBus input methods in the system: Go to System Settings -> Text Entry, remove all entries in the ‘Input sources to use:’ pane, except the default keyboard layout, and remove the keyboard shortcuts for “Switch to next source” and “Switch to previous source” by clicking inside the corresponding boxes on the right and hitting Backspace.
-
Install googlepinyin packages via Software Center or
sudo apt-get install fcitx fcitx-googlepinyin -
Use a terminal (Ctrl + Alt + T) to run:
im-config. When asked if you want to explicitly update the user preferences, select “Yes”, then select fcitx as the default input method framework. -
Reboot, the a keyboard icon appears in the upper right screen corner, where the input method and skin can be managed.
-
Go to System Settings -> Text Entry, uncheck the ‘Show current input source in the menu bar’, which will hide the IBus input framework.