With the Apache Spark installed through the steps described in last post, this post will introduce you the steps to set up a Scala development environment for Spark and build a WordCount application through Maven and SBT.
Althrough Spark can be programmed with either Java, Scala, or Python, this post will focus on Scala. There are a couple of reasons: 1) Spark itself is written in Scala; 2) Scala’s functional programming model is a good fit for distributed processing, thus has less code and boilerplate stuff than Java; 3) Scala compiles to Java bytecode, which gives faster performance than Python.
Table of Content
Installation and Settings
Install Scala IDE for Eclipse
You can download the lastest version of Scala IDE from http://scala-ide.org/download/sdk.html. At the time of this writing, the latest version is 4.7.0 which is based on the Eclipse 4.7(Oxygen) with Scala 2.12. After download, simply extract it into a folder, such as C:\eclipse.
Install Scala (optional)
Because the Scala IDE includes Scala versions, it is optional to install Scala programming language locally. But if you want to try Scala in an interactive way, you can download the latest Scala binary for Windows from the download page of scala and keep track where you installed it, such as C:\Program Files (x86)\scala.
Set SCALA_HOME Variables
Set environmental variables:
- Varaiable: SCALA_HOME
- Value: C:\Program Files (x86)\scala (or your installation path)
Add %SCALA_HOME%\bin to PATH variable.
You can check the installation with following command in cmd:
scala -version
Install SBT
SBT is a Simple Build Tool for Scala, Java, and other languagues. You can download the latest .msi file for Windows from https://www.scala-sbt.org/download.html. After download, doouble-click it to install.
To use SBT behind proxy, check following post out: https://stackoverflow.com/questions/27127687/how-to-use-sbt-from-behind-proxy-in-windows-7/29005026
Install Maven
You can download Maven from http://maven.apache.org/download.cgi. At the time of this writing, the latest version is apache-maven-3.5.3-bin.zip. Extract the downloaded zip file to C drive, such as C:\apache-maven-3.5.3.
Set MAVEN_HOME Variables
Set environmental variables:
- Varaiable: MAVEN_HOME
- Value: C:\apache-maven-3.5.3 (or your installation path)
Add %MAVEN_HOME%\bin to PATH variable.
You can check the installation with following command in cmd:
mvn -version
Set Maven in Eclipse
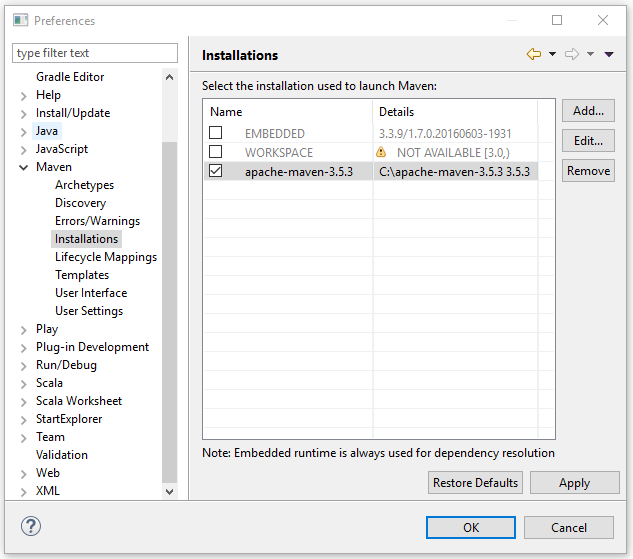
Open the installed Scal IDE, navigate to Window -> Preference and open Maven in the left pane of the Preference window. Click on the Installations and then click on the Add button to select the lcoation of the Maven directory (e.g.C:\apache-maven-3.5.3). Then select the added installation to launch Maven, as shwon in following screenshot:
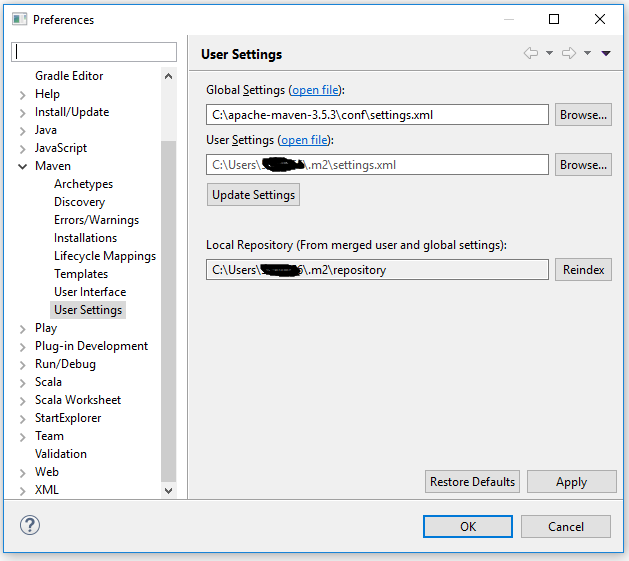
Then go click the User Settings, browser to corresponding settings.xml files for Global and User settings:
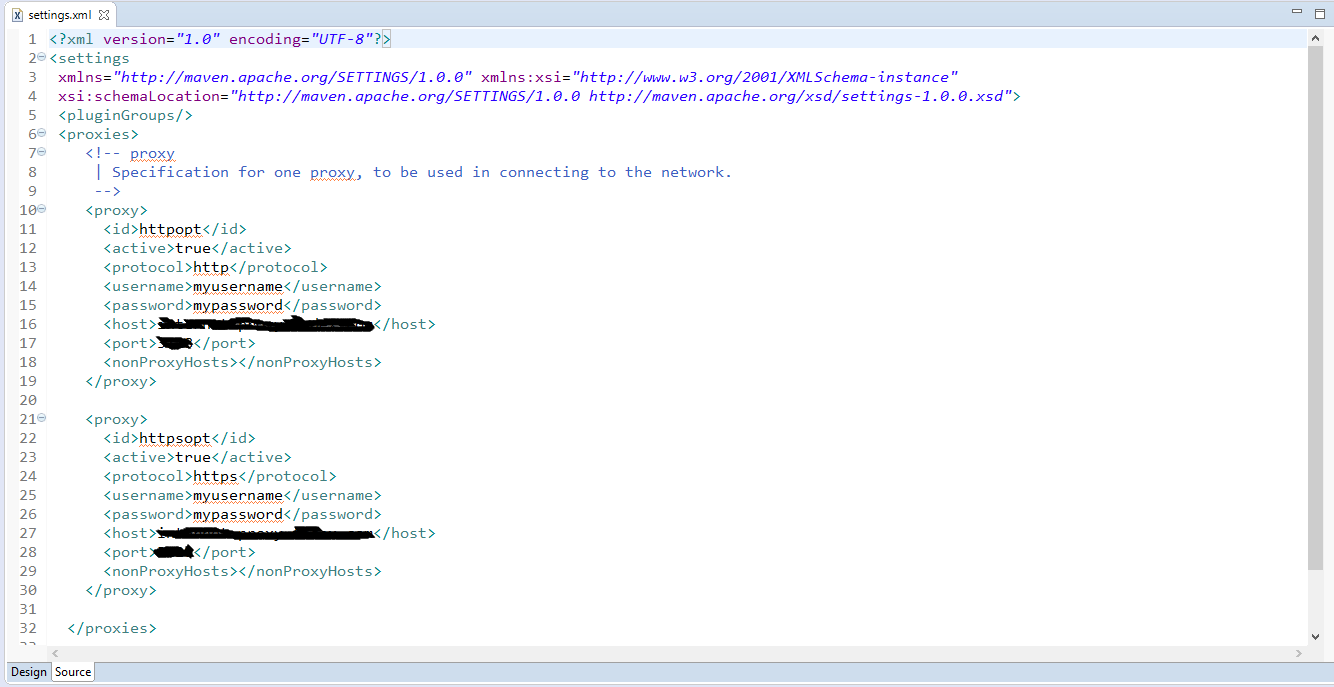
If you are behind proxy, you might need to set the proxies through the open file link:
Build WordCount Application
In this section, we are going build WordCount applications through Scala IDE, sbt, and MAVEN. The three applications are shared at Github repository.
The source code for WordCount scala object is shown as below:
package com.learningspark.example
import org.apache.spark._
import org.apache.spark.SparkContext._
import org.apache.log4j._

object WordCount {
  /** Our main function where the action happens */
  def main(args: Array[String]) {

    // Set the log level to only print errors
    Logger.getLogger("org").setLevel(Level.ERROR)

     // Create a SparkContext using every core of the local machine
    val sc = new SparkContext(new SparkConf().setAppName("Spark Word Count").setMaster("local"))

    // Read each line of my book into an RDD
    val input = sc.textFile("../book.txt")

    // Split into words separated by a space character
    val words = input.flatMap(x => x.split(" "))

    // Count up the occurrences of each word
    val wordCounts = words.countByValue()

    // Print the results.
    wordCounts.foreach(println)
  }

}
Scala IDE
Major steps to build the application in Scala IDE:
- Build a new scala project through New -> Project menu;
- Specify a package
com.learningspark.exampleunder the src folder; - Add a new Scala Object with the name of
WordCountand copy paste the above source code; - Add all
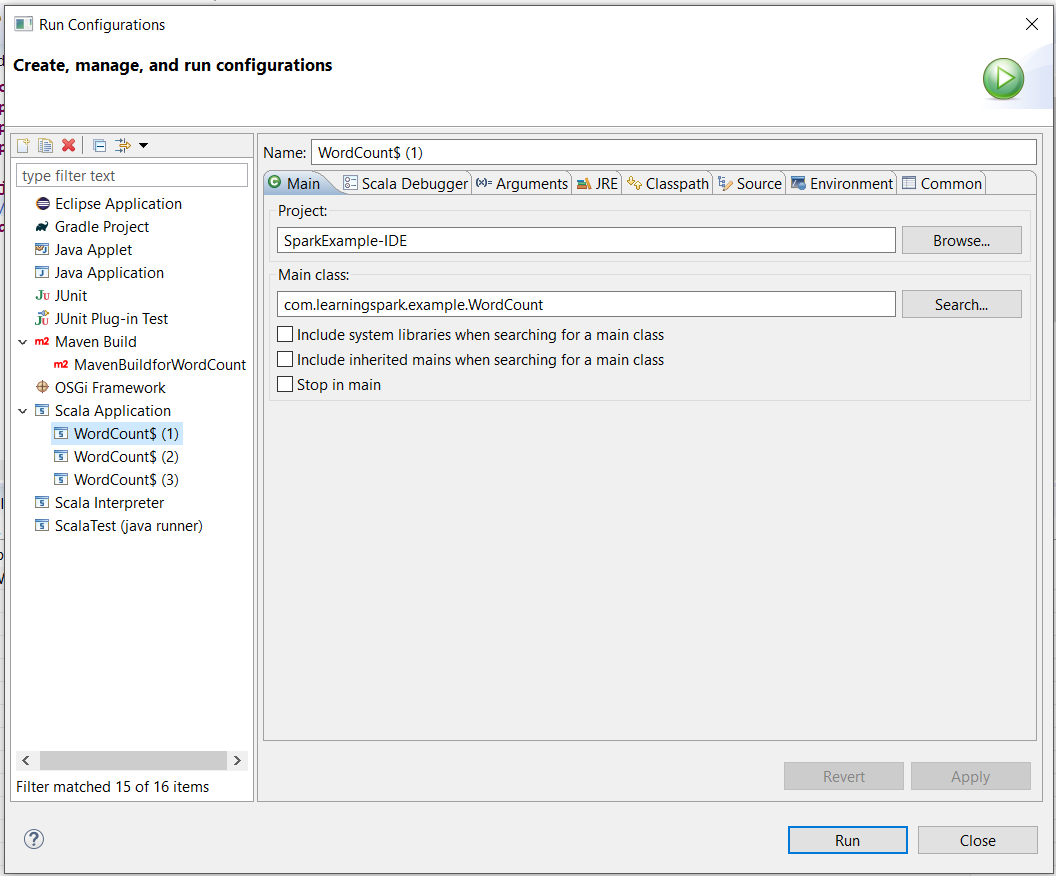
.jarfiles fromSPARK_HOME/jarsdirectory to the Java Build Path - Right-click on the scala object and Run As ->Run Configurations.., use following settings to build a new Scala application.
After testing and debugging, you can export the project into .jar file and use spark-submit command run the application in spark.
spark-submit \
--class com.learningspark.example.WordCount \
--master local[*] \
./target/WrodCount.jar
SBT
- Copy the above
WordCount.scalato a path ofsrc/main/scala/com/learningspark/example/in a project directory. - Make a file of
.sbtfile with settings similar to below:
name := "Spark Sample"

version := "1.0"

scalaVersion := "2.11.8"

libraryDependencies ++= Seq(
  "org.apache.spark" %% "spark-core" % "2.2.0" % "provided",
  "org.apache.spark" %% "spark-sql" % "2.2.0",
  "org.apache.spark" %% "spark-mllib" % "2.2.0"

)
- In the project folder where the
.sbtfile located, run commandsbt clean package - With successful build (there is a
classesfolder intarget), run command to submit application to local node:
spark-submit \
--class com.learningspark.example.WordCount \
--master local[*] \
./target/scala-2.11/spark-sample_2.11-1.0.jar
Maven in Eclipse
- Build a new maven project with all default values;
- Use Refactor to change source folder
src/main/javatosrc/main/scalaandsrc/test/javatosrc/test/scala; - Open the
pom.xmlfile and add the dependency from the Maven Repository. For example, below is the dependency forspark-core_2.11:
<!-- https://mvnrepository.com/artifact/org.apache.spark/spark-core -->
<dependency>
    <groupId>org.apache.spark</groupId>
    <artifactId>spark-core_2.11</artifactId>
    <version>2.2.0</version>
</dependency>
- Specify a package with the name as the combination of
groupIdandartifactIdspecified in thepom.xml; - Add the
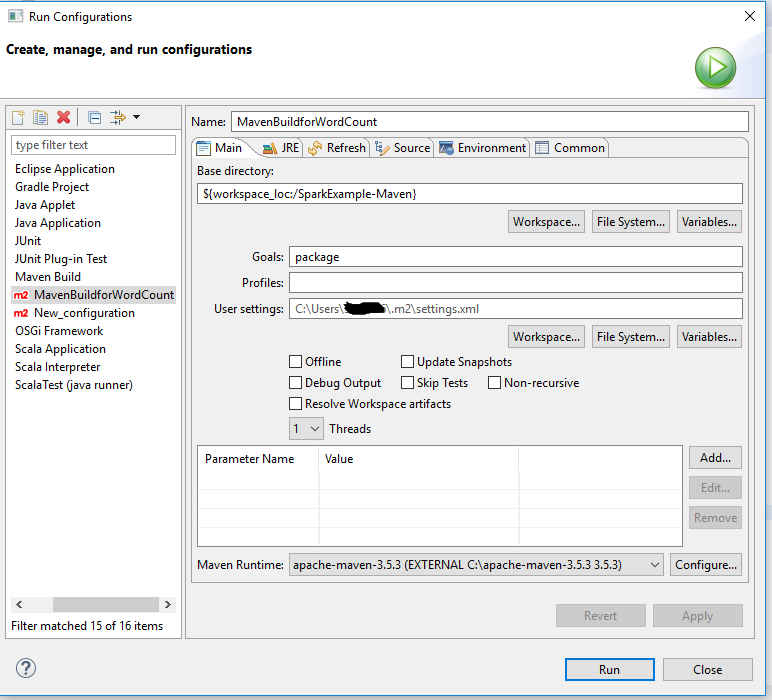
WordCount.scalaas scala object to the package; - Right-click and selct Run As -> Run Configuration.., then right-click on Maven Build ->New. Once the configuration window appears, fill the details as shown in the following screenshot. For the Base Directory, click on Workspace… and choose the project from the pop-up list.
- After successful build, run command to submit application locally:
spark-submit \
--class com.learningspark.example.WordCount \
--master local[*] \
./target/WordCount-0.0.1-SNAPSHOT.jar
Run Spark Application on Cluster
You can use spark-sumbit to run your Spark applicaiton on cluster, but need to keep somethings important in mind:
- Make sure there is no paths of input files pointing to your local file system in your script
- Package up your Scala project into a
Jarfile through Export in Scala IDE, build from SBT or Maven - The format of the command is similar to the local version, but might have other parameters to consider:
--master- yarn - for running a YARN/Hadoop cluster
- hostname:port - for connecting to a master on a Spark standalone cluster
- mesos://masternode:port
- Note: a master configureed in SparkConf in the driver script will override this!!!
--num-executors- must set explicitly with YARN, only 2 by default
--executor-memory- make sure don’t use more memory than available
--total-executor-cores- how many cores your application can use